Photoshop������(f��)�Ż���M�ɵ�ˇ�g(sh��)�֡�Ӣ��
����(l��i)Դ�� Tutsplus�����x���� Rose �o�҂�����(l��i)��(j��ng)���ʵ����£�Day of the Dead (Día de Muertos) is a Mexican holiday that celebrates the spirit and honors the memory of the friends and family members who have died. Marigold is the traditional flower used in the celebration of the Day of the Dead, as well as in the decoration of the Sugar Skulls, which are the most popular symbol of that day.
�̳��زģ�http://www.daimg.com/photoshop/201511/photoshop_74760.html
This tutorial will show you how to create simple marigold flowers, and use them with a couple of brushes, textures, layer styles, and shape settings, in order to create a Day of the Dead sugar skull-inspired text effect. Let's get started!
If you're interested in buying a graphic, vector, or template (to complement your work on the text effect), there's a useful collection of Day of the Dead items on GraphicRiver.
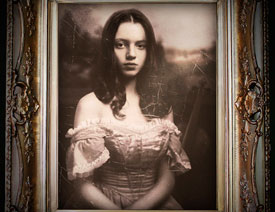
�ȿ���Ч���D

1. Create the Basic Guidelines
Step 1
Create a new 500 x 500px document, and pick the Line Tool.
Set the Foreground color to Red, and in the Options bar, set the Weight to 1.
Create a vertical line in the center of the document, and extend it a little bit outside.

Step 2
Duplicate the line shape layer, and rotate the copy line 60° counter-clockwise.

Step 3
Duplicate the copy line and rotate the second copy another 60° counter-clockwise.

Step 4
Select all the line shape layers, go to Layer > Merge Shapes, and rotate the merged shapes 30° clockwise. You can lock that layer if you like once you're done.

Step 5
Pick the Ellipse Tool and create a 366 x 373 px ellipse in the center of the document.
In the Options bar, change the Fill Color to White, the Stroke Color to Black, and click the Set shape stroke type icon to change Align to Outside.

2. Create the Petals
Step 1
Pick the Pen Tool, choose the Shape option in the Options bar, and set the Fill Color to White, the Stroke Color to Black, and its Size to 7.
What you'll need to do next is create the basic petal shape.
You can click once to add points, and click and drag to create curves. Use the shape below as a guide to how many anchor points you need and where they should be placed.
Don't worry about making the shape perfect, as we'll work on that in the next step.

Step 2
Once you create the basic shape, you can pick the Direct Selection Tool, and click-drag the anchor points to change their position.

Step 3
You can also click and move the handles at both ends of the anchor point to change the curve's shape.
Take some time to work on the petal shape until you like the result you get.

Step 4
Pick the Add Anchor Point Tool, and add four anchor points as shown below.

Step 5
Pick the Direct Selection Tool, and click and drag each of the second and fourth anchor points down, changing their shape as you like to create the jagged edges of the petal.

 ��(��i)�㲻Ҫ��
-
 Photoshop������(f��)���L(f��ng)�������ƬЧ����Ӣ��2018-04-23
-
 Photoshop�ϳ��L(zh��ng)����(chu��ng)����(sh��)���L(zh��ng)�i¹��Ӣ��2018-04-23
-
 Photoshop�ϳɱ�����Ч�Ľ��~(y��)��(ch��ng)����Ӣ��2018-02-10
-
 Photoshop�ϳɉ�(m��ng)���L(f��ng)���ɭ�ֈ�(ch��ng)����Ӣ��2018-02-10
-
 Photoshop�ϳ�����ʩ��������Ӣ��2018-02-10
-
 Photoshop���������|(zh��)�е�3D���w�֡�Ӣ��2018-01-09
-
 Photoshop�O(sh��)Ӌ(j��)����ȼ��ˇ�g(sh��)�ֽ̡̳�Ӣ��2018-01-09
-
Photoshop������(f��)���L(f��ng)�������ƬЧ����Ӣ��
���P(gu��n)����11882018-04-23
-
 Photoshop�����S���|(zh��)�����w�֡�Ӣ��
���P(gu��n)����7422018-02-10
Photoshop�����S���|(zh��)�����w�֡�Ӣ��
���P(gu��n)����7422018-02-10
-
 Photoshop�����@�G����3D���w��
���P(gu��n)����14682018-02-10
Photoshop�����@�G����3D���w��
���P(gu��n)����14682018-02-10
-
 Photoshop������(f��)���p���ع����w
���P(gu��n)����6532018-01-09
Photoshop������(f��)���p���ع����w
���P(gu��n)����6532018-01-09
-
 Photoshop����ľ�ذ�LOGO��ӡЧ����Ӣ��
���P(gu��n)����19272018-01-09
Photoshop����ľ�ذ�LOGO��ӡЧ����Ӣ��
���P(gu��n)����19272018-01-09
-
Photoshop���������|(zh��)�е�3D���w�֡�Ӣ��
���P(gu��n)����4612018-01-09
-
Photoshop�O(sh��)Ӌ(j��)����ȼ��ˇ�g(sh��)�ֽ̡̳�Ӣ��
���P(gu��n)����7612018-01-09
-
 Photoshop�����ɐ�(��i)���ǹ���֡�Ӣ��
���P(gu��n)����6722017-12-25
Photoshop�����ɐ�(��i)���ǹ���֡�Ӣ��
���P(gu��n)����6722017-12-25
